Meetings
111 DPC (Donald P. Corbett), 10-11:50pm Mondays and Wednesdays. Colored discs below indicate in-person lessons, by team color; a computer icon indicates a remote, synchronous lesson.
Instructor: Jon Ippolito, 581-4477, http://jonippolito.net.
Office hours by appointment; please sign up via Google Calendar (see links in Slack #reference channel).
Grading
25% weekly assignments, 25% final project, 12% badges, 12% quizzes, 12% tests, and 12% exit tickets/participation.
Participation is measured by quality and quantity of online and oral comments, as well as attempts to get help and help others.
Symbols
◆ ◆ In-person day for Red or Blue team
In-person exercise for Red or Blue team
✏️ Quiz or other Google Forms assignment.
CodePen assignment.
👆 Interactive assignment that you don't turn in.
Slack assignment
🗣 Discussion (in person or Zoom)
👨🏫 Live teacher presentation
📖 Reading
🍿 Viewing
🏅 Badge
🤖 AI practice
Required hardware and software
To accommodate collaborative learning, you're required to get a free CodePen account and install additional software as described in the first few lessons.
This class requires a laptop for in-person collaboration. The University Bookstore offers laptops that meet New Media requirements; a recent MacBook Pro or MacBook Air will do.
Staying healthy
Your instructor will ask you to stand up periodically to improve your health, and encourages you to mask if that makes you more comfortable.
Standard policies
Generative AI such as ChatGPT, Gemini, and Claude is transforming workplaces from education to industry. In general, your instructor grants you permission to use them for brainstorming, research, and debugging. As indicated in the syllabus, you will also be encouraged to use these tools for parts of certain assignments but not for every task. (You may also opt-out of using them without explaining why, in which case the instructor will give you a parallel assignment.)
💬 Why fundamentals still matter: in this course, fundamentals are prompt literacy. The vocabulary you learn here — selectors, the box model, listeners, fetch — is the same vocabulary that lets you steer an AI precisely and, more importantly, verify what it gives you. Look for the 📙 Words to build with callouts in each lesson: those terms work equally well in a stylesheet, a search of MDN, or a prompt. A few assignments are marked AI-restricted so you can prove these skills are yours; every AI-centered exercise has an equal-credit alternative path for students who prefer not to use generative AI.
In return, we ask that you:
💡 Remember that your not stuck with what generative AI returns as the first result; incremental prompting in which you request improvements and revisions usually generates better results.
⚠️ You will still be expected to put in significant effort on some aspect; for example, you might try a task with AI and write a detailed review of where it succeeded and failed.
🙅 Do not use AI to generate comments on other students' posts, which can degrade the personal connections over ideas and experiences that helps connect us in a digital space.
We also encourage adding your feelings, good or bad, about the experience in your posts. For more on the promise and perils of generative AI, see Learning With AI.
-
Complete the three-minute survey on basics of Web coding in the #reference Slack channel so your instructor can tell how prepared you are for this material and adjust accordingly.
Quizzes can be retaken as many times as you want before midterm review.
Skeleton (HTML tags=DOM="elements")
Muscle (JavaScript)
Clothes (CSS)
	<h4>My name is Jon and my favorite food is waffles.</h4>
	<h1>🧇</h1>
	<p id="total">Today I have eaten </p>
	body {
	  font-family: verdana ;
	  text-align: center ;
	  background-color: orange ; /* You can use most color names. */
	  color: white ;
	}
	h1 {
	  font-size: 5em ;
	}
	document.addEventListener("DOMContentLoaded", () => {
		document.querySelector( "#total" ).innerHTML += 16 ;
	});
🎩 To use an emoji in HTML, you can use your operating system defaults (Edit > Emoji & Symbols on MacOS) or type in the HTML character code (like &23F0;).
See next lesson for instructions.
Pass the quizzes in this interactive tutorial. The video player will offer you chances to review the material based on your success with the quizzes. When you get to the end, authenticate your badge by submitting your University of Maine Gmail account at the prompt (@maine.edu). You can often find a written version linked from the screencast.
FYI creating an HTML document is a little different in VS Code than in the code editor shown in this video. In VS Code, you create a file with a .html extension by clicking on the + at the top of your Explorer sidebar and then type ! and press Tab to get the boilerplate. Otherwise the guidance in this tutorial still applies.
Via YouTube or via a downloadable 220MB MPEG-4 or 23MB WebM file.
Watch the 5-minute video if you need an introduction to this courseware.
Link in the #reference Slack channel.
You will need a Web host where you can post client-side HTML, JavaScript, and CSS stylesheets for us to review in class. Create or confirm one of these options:
⚠️ You are not required to get a domain name (like "MaryGonzalez.com") for this class.
ℹ️ More in the Intro to Web Applications.
No purchase required. If you use GitHub Pages, you can upload right in the browser (Add file > Upload files) — no FTP app needed. If you use DreamHost or Bluehost, try the built-in browser file manager first. If you prefer a classic FTP app, FileZilla is free and cross-platform.
“Put it online” is a wish; “upload index.html to the nmd345 folder on my host” is an instruction.
How to show or hide file extensions in Mac OS X
How to Make Windows Show File Extensions
Continued from Lesson 1.00 — pick up wherever you left off. Finished already? Help a neighbor get Copilot running; it's the trickiest step.
⚠️ Not the same as Visual Studio! (memes)
<body>
	<!-- Add headers and paragraphs appropriate for a web page about __________ that use inline styles designed to be visually unappealing and intentionally unattractive. -->
</body>
🎓 Verified students get Copilot Pro free: sign up for the GitHub Student Developer Pack with your @maine.edu address. Approval can take a few days, so don't wait on it in class.
⛑️ If Copilot is not making suggestions, try:
Other optional VS code extensions
Did you find a cool one? Share it in the Slack #random channel!
ℹ️ Sample recommendations for formatting your code.
Skeleton (HTML tags=DOM="elements")
Muscle (JavaScript)
Clothes (CSS)
Nouns (HTML)
Verbs (JavaScript)
Adjectives (CSS)
Spaces v. tabs--your choice.
Be generous with horizontal space, but leave no vertical spaces.
HTML
<html>
	<body>
		<div>
			Here's my first block of text.
		</div>
		<div>
			Here's my second block of text.
		</div>
	</body>
</html>
<html>
	<body>
		<div>
			<p>I <strong>hate</strong> following rules!</p>
		</div>
	</body>
</html>
CSS
#grumpy {
	color: red ;
}
.cat {
	width: 100px ;
}
#news {
	width: 100%;

	.headline {
		font-size: 4em ;
	}
}
#news {
	width: 100%
}
#news .headline {
	font-size: 4em ;
}
Tools
🤖 Suggest any improvements in indenting of the current document for make it more readable and to clarify parent-child relationships.
Wendy Seltzer, 2017 Digital Humanities Week, University of Maine
Featuring monkey selfies, hip hop sampling, and Howard Stern's interviews with Donald Trump
ℹ️ Still the best foundation on fair use, though recorded before Warhol v. Goldsmith narrowed "transformative" and before the AI-training lawsuits — see the update below.
What has changed since Seltzer's talk, with a special focus on whether AI training violates copyright and AI-generated media can be copyrighted.
Matt Wolfe breaks down the 2025 US Copyright Office guidelines for AI-generated content.
What If Someone Infringes Your Copyright?
Is it Fair Use or Infringement?
Due by class time
On Codecademy CSS Setup and Selectors (link in Slack)
In this assignment you'll use GitHub Copilot in VS Code to clean up your ugly web page, then in CodePen you'll try to improve its appearance by simplifying and harmonizing the CSS styles.
🤖 Move all the styles into a CSS stylesheet in the head of this document. Be sure to use at least one of each of the following:
* A tag selector;
* A class selector;
* An id selector.
(If necessary, click on the name of the file at the top of the chat.)
🤖❌ Hate AI? You can de-uglify manually: generate code snippets from http://www.w3schools.com/css/css_examples.asp and paste them into your new stylesheet at top. Post to #troubleshooting when you get stuck.
Due by class time
After viewing some of the videos in this lesson's reading, complete this quiz on how not to get sued for violating someone's intellectual property and whether AI is theft. (See link in Slack's #reference channel.) Don't worry if you don't know the answer. We will review the answers in class.
Due by class time
This poll only counts toward your participation grade but we will use the results in class. Please indicate your opinion based on what you've learned from class readings/viewings (link in #reference).
“Make the heading red” fails if the AI can’t tell which <h2>, class, or id you mean — selectors are how you point at exactly one thing, whether you’re writing CSS or a prompt.
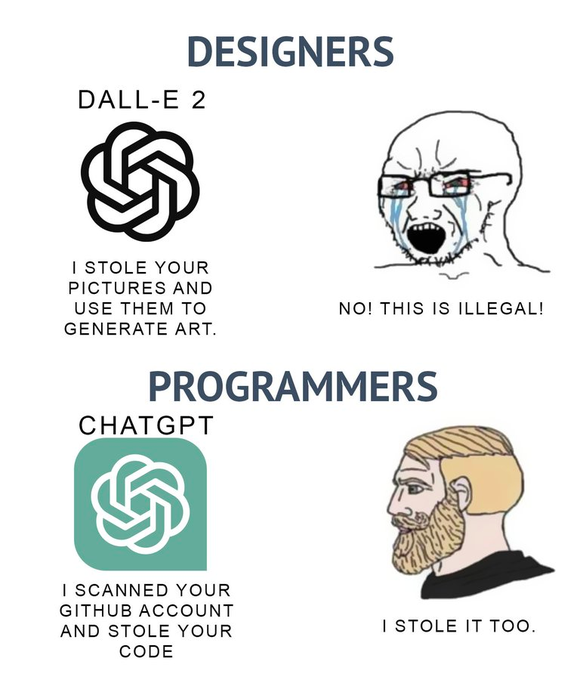
Can AI be ethically trained on human creations? As makers, ask it both ways: can you use it — and can you protect what you make with it? Is there a difference between training AI on code versus writing, images, or music?
Test your intuitions about AI's energy and water footprint with the calculator at What-Uses-More.com.
💡 To add a new line without submitting your prompt, type shift-return.
🤖🙅♀️ Non-AI version: Complete CSS Setup and Syntax (1-7), Selectors (1-14), and Visual Rules (1-10) under "Syllabus" at Codecademy. You'll need to make a free Codecademy account for this.
Your FTP login credentials were emailed to you when you signed up for your WordPress hosting account.
You can also find your FTP account information in your hosting account’s cPanel dashboard.
https://maryrodriguez.com/nmd345/bunny.jpg
Try this first instead of an FTP app:
Try this first instead of an FTP app:
If you use your web host primarily for WordPress and a public URL fails to load in browser due to WordPress redirect, ask your instructor to show you how to add this to your .htaccess file
RewriteRule ^(folder)($|/) – [L]
CSS Visual Rules (1-10), link in #reference
Questions based on "Is the AI an Artist?", link in #reference. Required: 0:00-34:00; optional 34:00-52:47 (end)
Come to class prepared to describe one or more ideas for a project you can develop in this class using HTML, CSS, and JavaScript. Your idea can be personal (eg, a portfolio) or from another class (eg, a capstone website); if the latter, you'll be expected to do enough work to satisfy both classes. You need not post anything for this assignment.
Research the CSS name you chose and post a brief, one-sentence definition to #css-name. Memorize this!
Then, in your own words, add a new paragraph to the same post (option-return in Slack) giving an example of how that CSS technique might be used in your class project.
If you think you didn't do well, retake any of the previous quizzes to get a better grade. (See links in Slack's #reference channel.)
“Make it darker” is vague; “keep the hue, drop the lightness to 30%” works on both browsers and chatbots.
Visit the Class Sheet in #reference, consult the links in the "Code names" tab, and add a CSS color name you can use in your project to the appropriate column.
⚠️ This must be an official CSS color name, not something you made up like "warmdarkgray" or "gooeypeanutbutter."
Pairs compare their CSS names and brainstorm how to use their partner's name in their project. Then each defines the other's name for the class.
Smallest effective difference
👎 Hex
👎 RGB
👍 HSL
:root {
  /* Set your CSS variables here. */
  --medium: blue ;
  --accent: lime ;
  --card-width: 500px ;
  /* You can also use "calc" to calculate dimensions. */
  /* ⚠️ Leave space around operators like + and - */
  --leftover-width=calc( 100% - card-width ) ;
}
card {
  width: var(--card-width) ;
  background-color: var(--medium) ;
  border: var(--accent) solid 1px ;
  margin-left: var(--leftover-width) ;
}
👍 okLCH
🎗 "Less Chaotic Hues" or "Let's Chuck HSL"
⚠️ Technically you can define oklch with %s for l and c, but you have to use decimals (numbers without the % sign) in calculations.
⚠️ Unless you set c=0, you cannot get pure white even if you set l=1.
🤔 Why is not every color combination available?
☕️ Think of chroma as coffee strength — how intensely it tastes.
Vivid color needs medium lightness, like flavor needs medium dilution—in that sense it is clamped.
Fork this template and follow the steps in the CSS code to make a pleasing color scheme with a limited palette. You can find color names at Tinyurl.com/css-colors. Save your Pen and post the URL to #limited-palette.
color: oklch(from rgb(210 60% 50%) l c h);
Alternative: if you prefer not to use oklch, you can use hsl with this formula:
color: hsl(from rgb(210 60% 50%) h s l);
CSS Box Model (1-16) and CSS Display and Positioning (1-12)
Retype the code in sample page in a Pen to create a multicolumn Web page with absolute positioning. (You'll need to separate the CSS into its own pane.)
Then tweak the colors or dimensions to your liking. For now, you can use HSL or CSS color names like lightskyblue, mediumpurple, etc. You're not making a masterpiece, just a template to work with.
Post the URL for your Pen to #positioning.
Pairs compare their CSS names and brainstorm how to use their partner's name in their project. Then each defines the other's name for the class.
Prompt the class chatbot for practice with "Layout with CSS Flexbox." Paste the link to your conversation in #chat-css-2
You will use the flex property more than its subdivisions flex-grow, flex-shrink, or flex-basis.
padding, border, margin
"Add more space" — but where? Three different results:
.card  { padding: 2rem; }  /* space INSIDE the border — the card grows */
.card  { margin: 2rem; }   /* space OUTSIDE — the card pushes neighbors away */
.cards { gap: 2rem; }      /* space BETWEEN siblings — set on the PARENT */
Same vague request, three different layouts. Naming margin, padding, or gap — and whether it goes on the child or the parent — is the difference between steering and gambling, with an AI or with yourself.
☹️ By default, adding padding and borders expands a div beyond the width declared in CSS. That sucks!
🥪 Sandwich versus 🌮 taco exercise
🙂 To force them to stay inside the width, add box-sizing: border-box to the div's CSS.
Absolute versus relative positioning.
Best for left and right margins. Keep top and bottom as pixel values.
Every student forks their two-column absolute positioned Pen ( or forks this instructor version and converts it into a relatively positioned page in class:
Post the Pen URL to #absolute-to-relative.
Start work on next assignment.
-
Fork this simple HTML layout and follow the instructions in the comments to convert it to a two-column layout using CSS Flex. Save your Pen and post the URL to #flex.
CSS Flex (1-9, but not including flex-grow, flex-shrink, or flex-basis)
UPDATE: Find the Pen created in the last class with two relatively positioned columns and make these changes:
<div id="columns">
  <div id="left-column">
    ...
  </div>
  <div id="right-column">
    ...
  </div>
</div>
#columns {
  display: flex ;
  width: 500px ;
}
#columns {
  ...
  gap: 1em ;
  margin-block: 1em ;
}
⚠️ A tag needs no # or . before the selector.
body {
  display: flex ;
  height: 100vh ;
  justify-content: center ;
  align-items: center ;
}
Save your Pen and post the URL to #relative-to-flex.
“Make the button feel clickable” is a wish; “add a hover state that lifts it and a visible focus ring” is an instruction. (Keyboard users see focus rings where mouse users see hovers.)
Prompt the class chatbot for practice with "CSS Interface Design for Links and Buttons."
🤖🙅♀️ Non-AI version: Complete "Learn Links and Buttons" Codecademy lesson.
Write a when/then spec for one interaction, eg, "when the user hovers over the card, raise it and show a shadow; when it has keyboard focus, show a visible ring." — then implement it in a new Pen. Full credit if every "when/then" survives into a pseudo-class.
👎 Inline
<div style="background-color: teal">
	Here's some cool text!
</div>
😐 Stylesheet in the head
<html>
	<head>>
		<style>
				div {
					background-color: teal ;
				}
			</style>
	</head>
	<body>
		...
	</body>
</html>
👍 External stylesheet
<!html>
	<head>
		<link rel="stylesheet" href="portfolio-styles.css" />
	</head>
	<body>
		...
	</body>
</html>
		<!DOCTYPE html>
		<html>
			<head>
			<link href="style.css" rel="stylesheet">
			...
		</html>
⚠️ If you opened the files in the src folder, this line will be missing and your website will break.
https://maryrodriguez.com/nmd345/index.html
Start work on next assignment.
Find the Pen created in the last class with columns built with flexbox, and make these changes:
body {
  display: grid ;
  height: 100vh ;
  justify-content: center ;
  align-items: center ;
}
#columns {
  display: grid ;
  ...
}
#columns {
  display: grid ;
  grid-template-columns: 1fr 1fr ;
  ...
}
#columns {
  display: grid ;
  grid-template-columns: 2fr 3fr ;
  ...
}
So far this is not much better than flex, but grid has much more to offer. For now, save your Pen and post the URL to #flex-to-grid.
Naming your regions (eg, “header spans both columns”) makes it easy to layout your page with grid or a chatbot.
Pairs compare their CSS names and brainstorm how to use their partner's name in their project. Then each defines the other's name for the class.
Prompt the class chatbot for practice with "Layout with CSS Grid."
🤖🙅♀️ CSS Grid Essentials (1-6) under "Syllabus" at Codecademy
📖 Additional reference: CSS grid
Realtime Colors (see palettes in context)
Fontpair (see headlines and body typography, under Pairings)
Utopia (handy clamp settings for responsive type)
CSS grid helps you lay out a web page by writing down a visual pattern of areas. The goal of this exercise is not to make a beautiful web page, but to give you practice with this technique.
<div id="logo">
	logo
</div>
#logo {
	background-color: lavender ;
	grid-area: logo ;
}
grid-template:
	".			logo		logo			.				."
	".			navigation	description		description		."
	".			.			description		description		."
	".			links		links			links			."
;
grid-template:
	".			logo		logo			.				." 10vh
	".			navigation	description		description		." 30vh
	".			.			description		description		." 10vh
	".			links		links			links			." 10vh
;
🎗 50vh means 50% of the available viewport height.
grid-template:
	".			logo		logo			.				." 10vh
	".			navigation	description		description		." 30vh
	".			.			description		description		." 10vh
	".			links		links			links			." 10vh
	/1fr		2fr			2fr				2fr				1fr
;
⚠️ Don't forget the leading slash /.
🎩 It may take some fussing with tabs, but lining up the columns will make your grid template more readable.
grid-template:
	".			links		links			links			." 10vh
	".			logo		logo			.				." 10vh
	".			navigation	description		description		." 30vh
	".			.			description		description		." 10vh
	/1fr		2fr			2fr				2fr				1fr
;
Find the sketch your instructor posted to #reference of a specific grid layout, then try to reproduce it in code with a Pen:
Build a wireframe layout with HTML and CSS based on the attached sketch.
Use CSS grid-template based on the area names in the diagram.
Estimate column and row heights and widths based on the proportions in the image, and use fr or vh and vw units to set these in the grid-template rule.
Give each area a random background color to distinguish them, but make each a CSS color name rather than (say) a hex value.
Return separate HTML and CSS that I can paste into a v1.0 CodePen.
The safest way to import fonts is to upload them to your web host as described in the "Import Web Fonts" tutorial. For this exercise, however, you can use a CSS @import statement with an online font service as follows:
#logo {
	font-family: 'Bonheur Royale', cursive ;
}
Post your Pen with its four custom fonts to #custom-grid-and-fonts.
⚠️ Using too many fonts can clutter your design--this is just an exercise 😅
Advanced CSS Grid (1-2
📅 Due the day before class at midnight
In the class Google Sheet (link in #reference), find the tab at bottom for this lesson and add your name to the left side.
Then visit the associated URL and look at all of the designs. For Style Stage, these will correspond to your portion of the alphabet. for CSS Garden, they will be visible in the right-hand sidebar (you can click the arrows to see thumbnails).
Pick your favorite and post a screenshot with a brief explanation of what makes it good web design to #css-garden.
📅 Due by class time
Vote for your three favorite CSS Garden designs by other students by adding thumbs-up reaction emojis (👍) in #css-garden.
Saying “Make it pop” is ambiguous; “decrease the contrast between heading and body, add whitespace around the hero” is more specific.
Pairs compare their CSS names and brainstorm how to use their partner's name in their project. Then each defines the other's name for the class.
Instructor feeds the Style Stage HTML to a chatbot live; the class critiques the result against the human entries just reviewed. AI can draft output, but isn't a designer.
Descriptive tags act like divs but can make your code more readable and accessible
Legacy formats that can be useful to tweak parts of your layout.
#container {
	...

		div {
			display: grid;
			place-items: center;
		}

}
<div id="watermark">
	Watermark
</div>
#watermark {
	background-color: red;
	opacity: .5 ;
}
#watermark {
	background-color: red;
	opacity: .5;

		grid-row: 1 / 3;
		grid-column: 1 / 3;

}
⚠️ The grid-row and grid-column properties can be confusing because the second number should often be 1 higher than expected. This is because the numbered boundaries are between the cells, not on them.
Experiment with different numbers to see the results.
<div id="first-cell">
	<a href="https://www.google.com" target="_blank">First</a>
</div>
🐞 If your watermark overlaps this link, you can't click on it!
#watermark {
	...
	pointer-events: none ;
}
-
🤖❌ AI not allowed for the CSS Ninja assignments, except to ask a chatbot to answer factual questions without writing or "fixing" your code. Share your chat transcript when you post to confirm how you used it.
Acting as a tutor who answers factual questions without directly writing or fixing my code, help me with ________________.
Read the CSS Ninja instructions, and imagine how you might style your own version of the CSS Ninja page. Remember that you can only change the CSS, not the HTML.
You do not need to use the palette you chose for your class project; this is a chance to show off your creativity using any of the techniques you've learned so far.
💡 It may be helpful to minimize the JS pane and choose a layout with the HTML and CSS code at left and preview at right. You can do this via buttons at upper right.
Post the URL for your CSS Ninja page to #css-ninja-colors. You'll get a chance to revise your CSS the following class, so come prepared to present any last-minute bugs you encountered.
nav {
	...
	a {
		background-color: lavender ;
	}
}
button {
	display: grid;
	place-items: center;
}
⚠️ This is a neat trick, but it can be overkill if you just want to center a single line of text. In that case, you can use text-align: center instead.
#watermark {
	...
	pointer-events: none ;
}
<!-- This label tells screen readers what the navigation is for. -->
<nav aria-label="main navigation">
	...
</nav>
<!-- This attribute hides the watermark from screen readers. -->
<div id="watermark" aria-hidden="true">
</div>
grid-template:
	".			logo		logo			.				." 10vh
	".			navigation	description		description		." 30vh
	".			.			description		description		." 10vh
	".			links		links			links			." 10vh
	/1fr		2fr			2fr				2fr				1fr
;
#wide-cell {
	/* This will span THREE cells.
	grid-column-start: 1; grid-column-end: 4;
	/* You can combine these on a single line: */
	grid-column: 1 / 4;
}
#wide-cell {
	/* This will span ALL cells to the end of the grid. */
	grid-column-start: 1; grid-column-end: -1;
	/* You can combine these on a single line: */
	grid-column: 1 / -1;
}
⚠️ The -1 technique is a quick way to stretch content across the entire grid, but it can be less flexible than the other techniques if you later want to add more rows or columns.
grid-template:
body {
  background-color: darkslategray;
  color: saddlebrown;
  margin: 0;
  display: grid;
  grid-template:
    "hero" 20vh
    "navigation"  10vh
    "description" 1fr
    "projects"    20vh
    "footer"  1fr
    / 1fr;
}
  grid-template:
	".			.		hero			hero				." 10vh
	".			navigation	description		description		." 30vh
	".			navigation	description		description		." 10vh
	".			projects	projects		projects		." 10vh
	".			footer		footer			footer			." 10vh
	/1fr		2fr			2fr				2fr				1fr
;
Take a screenshot of the furthest screen you can reach by the end of class, and post the URL for your screenshot to #grid-garden.
🤖❌ AI not allowed for this assignment either, except to answer CSS questions (not generate code).
Acting as a tutor who answers factual questions without directly writing or fixing my code, help me with ________________.
Visit the Pen you made for the last class and add images via the background-image property. Remember that you can only change the CSS, not the HTML.
💡 It may be helpful to minimize the JS pane and choose a layout with the HTML and CSS code at left and preview at right. You can do this via buttons at upper right.
#hero {
	background-image: url( https://maryrodriguez.com/nmd345/cat.jpg ) ;
	background-size: cover ;
}
(You can also use the background-position property to move the image to one side, or the background-repeat property to prevent it from tiling.)
💡 To keep your Web design from looking boxy, consider adding transparency, partial borders, gradients, rounded corners, and/or other features explained in the tutorial. Don't forget you can also alter any of these properties:
🛠 Troubleshooting
Post the URL for your CSS Ninja page to #css-ninja-images. You'll get a chance to revise your CSS in class, so come prepared to present any last-minute bugs you encountered.
Chatbots won't necessarily understand what “Less boxy” means, but they will understand “add a linear gradient from white to skyblue” or “add a border-radius of .5em”.
Spot the rookie mistakes in eight example pages, then toggle to the professional fix and the code that makes the difference. Keep the Reference Wall handy; you'll check your final project against it later in the term.
section {
	❌ background-color: lightblue;
	✅ background-image: linear-gradient( lightblue, hsl(210, 60%, 70%) );
}
background-image: linear-gradient( to right, lightblue, hsl(210, 60%, 70%) );
background-image: radial-gradient( circle, white, hsl(210, 40%, 70%) );
#hero {
	background: linear-gradient(
		to right,
		lightblue 0%,
		skyblue 40%,
		hsl(210, 60%, 65%) 70%,
		hsl(210, 60%, 55%) 100%
	);
}

.card {
	background: radial-gradient(
		circle,
		white 0%,
		lightblue 35%,
		hsl(210, 50%, 70%) 65%,
		steelblue 100%
	);
}
In pairs, choose which version of this exercise you want to do, and then share your results with the class at the end.
gap or padding.background-color or opacity.Suggest 5 small CSS changes that would make this layout less boxy and more airy. Use only properties we know: background-color, color, font-size, font-family, grid-template, gap, padding, opacity, or gradients.
Prompt the Webster class chatbot in #reference to help you study for the CSS concepts you feel shakiest on, eg:
Non-AI alternative: Review the CSS concepts you feel shakiest on by re-doing the Codecademy lessons in #reference marked with "🤖❌".
Try your hand at the ungraded CSS review quiz in the Slack #reference channel.
Make any final adjustments to your CSS Ninja page and post the URL to #css-ninja-final.
Retake the ungraded CSS review quiz in the Slack #reference channel.
Prompt the Webster class chatbot in #reference to help you study for the CSS concepts you feel shakiest on, eg:
Intro to JS, Variables, and Conditional Statements
A function is a recipe: parameters are the ingredients, the return value is the dish — and writing the recipe isn’t cooking; nothing happens until you call it.
Prompt the class chatbot for practice with "Introduction to Variables," "Advanced Variables," and "Conditionals."
Before writing any code, describe a small interaction as instructions a browser could follow, using the body metaphor: when the page senses an event (listener), it decides (function, maybe a conditional) and moves (changes the DOM or CSS). Full credit if every "when/then/if" in your spec survives into a named JavaScript concept. Handy metaphors: a recipe is a function; a bouncer is a conditional (if over 21, enter; else turn away).
Feature
P5js
JavaScript
Preparation
setup, createCanvas
document for HTML, app for Adobe
Start
draw
onload
Units
30
30px, 30% (CSS)
Edges
stroke
border (CSS)
Colors
fill, background
color, background-color (CSS)
Shapes
rect, ellipse
div, canvas
Variables
let x=30
let x=30 — identical!
Output
print()
console.log()
Random
random(255)
Math.random()
Interaction
mousePressed()
addEventListener("click", …)
Position
mouseX
event.clientX
The big shift
draw() loops 60×/second
the page waits for events
Your instructor will show this table with the JavaScript column blanked out; fill it in together before revealing the answers.
Live demo: a trivial P5js sketch (a colored circle follows the mouse) translated into a div plus an event listener in CodePen [TO BUILD: paired Pens]. Proof that you already know how to program — only the dialect changed.
Illustrator and Photoshop
Web inspector
Bookmarklets
Greasemonkey
Browser add-ons
Michael Mandiberg, The Real Costs
h4>target="_blank">Shaved BieberComplete the course evaluation you'll find in #reference. (There is no Slack submission for this anonymous survey.)
Functions and Scope
Fork the querySelector exercise Pen and fill in the blanks in the JS pane to let users change the style when the button is pressed. Don't forget that class names need a period (.) before them and ids need a hashtag (#). Post the URL for your pen to #queryselector.
Research the JavaScript name you chose and post a brief, one-sentence definition to #js-name. Memorize this!
Then, in your own words, add a new paragraph to the same post (option-return in Slack) giving an example of how that JavaScript technique might be used in your class project.
Watch at least five of the tutorials in the Creative Networks student showcase. These screencasts are designed to give you a sense of a past student project as well as an HTML, CSS, or JavaScript technique required to make it.
Warning: developers use several words for one thing — the DOM is the browser’s live copy of your HTML; a tag, an element, and a node are all the same box seen from different angles. Knowing the synonyms means MDN, Stack Overflow, and AI answers all make sense — and your prompts land no matter which dialect the model replies in.
Drag each term into its cluster [TO BUILD: drag-and-drop page]: DOM=element=tag=node; web developer=front-end developer=HTML/CSS/JS coder; stylesheet=CSS=styles=rules. The game itself is built with the drag events you'll meet in this unit.
Case sensitivity
White space
Line breaks
Optional semicolons
Comments
Loose-typed variables
Local v. global variables
HTML Tags and DOM elements (like variables, but preset)
methods (like functions, but preset)
Operators
Arguments
Returning answers
Prompt the class chatbot for practice with "Functions" and "Scope."
Here are some universal CSS font families:
// Set backgrounds to a dark color.
let allDivs=document.querySelectorAll("div") ;
allDivs.forEach( div => div.style.backgroundColor="dimgray" ) ;

// Change all paragraphs to a light color.
let allPs=document.querySelectorAll("p") ;
allPs.forEach( p => p.style.color="white" ) ;

/* Change some other aspect of the page to your liking. */
allPs.forEach( p => p.style.fontFamily="Comic Sans MS" ) ;
document.querySelector( "#top-headline" ).style.fontSize="3em" ;
⚠️ Simpler web sites will be easier to adjust.
⚠️ Stick to universal web fonts for this exercise.
Begin work on this assignment due Monday.
Arrays + Loops, link in #reference
Fork the instructor's Indent JavaScript Pen and maximize the JS pane. Follow the instructions in the Pen to format this code properly. Then take a screenshot of your final product (just the JS pane) and post it to #indent-js.
Working with the Pen you made last time as a fork of the querySelector exercise, add some JavaScript that changes several items on the page at once (eg, with the same tag or the same class). You'll use querySelectorAll to create an array of items that match your criterion, and then loop through those with .forEach to change their color, display, or other properties. Post the URL for your pen (it can be the same as last time) to #querySelectorAll.
The checkout line: the array is the items on the belt (starting at item 0), the loop body is what the cashier does to each one, the receipt is your output.
Describe your loop as a checkout line before you code it: the array is the items on the belt, in order; the loop body is what the cashier does to each item; the running total on the register is your accumulator — it exists before the loop starts and is still there after the belt is empty (declare it inside the loop and you've got a register that resets after every item); the receipt is your output. If you can say what's on the belt, what happens to each item, and what's on the receipt, you've specified the loop — and written a competent prompt.
Skeleton (DOM=tags)
Muscle (JavaScript)
Skin ( CSS )
Luggage ( external sources )
External events ( event )
Senses ( listeners)
Nouns (DOM )
Verbs (JavaScript)
Adjectives ( CSS )
Adverbs (event listeners )
⚠️ CodePen will wait for HTML to load before running JavaScript, but a normal web page requires onload.
Prompt the class chatbot for practice with "Arrays" and "Loops."
body {
	display: grid;
	place-items: center;
	height: 100vh;
}
div {
	// Optional:
	width: 80vw;
}
By id.
by variable name.
// Change one tag.
document.querySelector("#rover").style=...
document.querySelector("#fido").className=...
document.querySelector("#buster").innerHTML=...
// Change many tags.
document.querySelectorAll("div").forEach( div => ... )
document.querySelectorAll(".dog").forEach( div => ... )
// Find all list items in a menu.
document.querySelector("#menu").querySelectorAll("li").forEach( item => ...)
// Or
let menuDiv=document.querySelector("#menu") ;
menuDiv.querySelectorAll("li").forEach( item => ...)
// Old school methods: no leading # or .!
document.getElementById("rover")
document.getElementsByClassName("dog")
document.getElementsByTagName("div")
console.log()
alert()
confirm()
prompt()
innerHTML="new content"
location="home.html"
Selected students complete these two JavaScript style assignments using your JavaScript (and maybe CSS) names.
// Change the color of one item.
_________ _ _________("#grumpy") _ _________ _ _________="red" ;
// Change the color of several items.
_________ _ _____________(".cat") _ _________(
	{
		catDiv ___ catDiv _ _________ _ _________="red" ;
	}
);
Begin work on "Loop through an Array" assignment.
-
Iterators, link in #reference
For this assignment, you'll create a menu and use JavaScript to populate it with items from an array. Refer to Codecademy lessons or this related Pen for syntax, but choose your own topic. Examples:
⛑ You'll use these, in this order:
⚠️ You should not need these:
Post your Pen URL to #loop-through-array.
Give the menu you built from your array a modern dropdown treatment using the new CSS primitives: the popover attribute, a @starting-style entry transition, and :focus-within so the menu survives keyboard navigation (with <details>/<summary> as a zero-JS baseline). Then re-use those exact terms to prompt an AI for a styled menu, and add a sentence comparing the two when you post — vocabulary first, machine second.
ℹ️ On the horizon: appearance: base-select lets you style the actual <option> picker of a native menu — Chromium-only today, gracefully ignored elsewhere. Progressive enhancement means you can ship it anyway.
“Make a nice dropdown” gets you 2019; naming the popover attribute and a starting-style transition gets you a menu that animates open — and works without a mouse.
Pairs compare their JS names and brainstorm how to use their partner's name in their project. Then each defines the other's name for the class.
Prompt the class chatbot for practice with "Iterators."
	 /* Create CSS variables. */
	 :root {
	--background: skyblue ;
	--spacing: 1em ;
}
/* Use them in your CSS selectors. */
body {
	background-color: var(--background) ;
}
div {
	color: var(--background) ;
	margin-bottom: var(--spacing) ;
}
/* Change the value of a CSS variable in JavaScript. */
document.documentElement.style.setProperty("--background", "turquoise") ;
Working in pairs, brainstorm how you might use the Single-page Navigation tutorial technique in your final project. (You can earn the badge now, or just review the video on its own or read the transcript for reference.) Then begin work on both of your Pens due in the next class..
After earning the badge for the tutorial above, you should have a good sense of how to use JavaScript to show and hide different sections of a web page. This is a common technique for creating click-based navigation without needing to load a new page. For example, you might use this technique to create a tabbed interface that lets users switch between different views of your project, or to create a "read more" button that expands a section of text when clicked.
Imagine a section of your final project that would benefit from this kind of navigation, and create or modify a web page to include it. If you're struggling to think of a use for this technique in your project, you can use this sample HTML from the tutorial.)
When you're done, post the url for your updated launch page (it can be the same as before) to the #single-page-navigation channel.
“Hide the other sections when one is shown” — naming show/hide and state turns a vague wish into a buildable spec.
/* This turns all link tags blue. */
a {
	color: blue ;
}
/* This turns only links inside a <nav> menu red. */
a {
	color: blue ;
}
nav {
		a {
			color: red ;
		}

}
/* Here's an older way to nest selectors. */
nav a {
	color: red ;
}
/* This shifts a tag left or down. */
transform: translate( 100px, 200px );

/* This animates any change. */
transition: all 2s ease-in-out;

/* This pseudoselector applies styles only on mouseover. */
_____:hover {
	...
}
screen.width, screen.height
You can set a tag's CSS positions and dimensions in JavaScript.
document.querySelector("#rocket").style.left="10px" ; // Set a specific left position.
document.querySelector("#rocket").style.top="300px" ; // Set a specific top position.
Setting the CSS translate() function in JavaScript is the easiest way to shift a tag by a certain amount.
document.querySelector("#rocket").style.transform="translate( 10px, 30px )" ; // Set a specific left and top displacement.
⚠️ You can't access positions and dimensions in JavaScript that have been set in CSS.
<!-- ❌ The wrong way. -->
<style>
	#rocket {
		left: 100px ;
	}
</style>
<script>
	alert( document.querySelector("#rocket").style.left ) // Undefined!
</script>
⚠️ You can access positions and dimensions if you set them in JavaScript instead.
<!-- ✅ The right way. -->
<script>
	document.querySelector("#rocket").style.left="300px" ;
	alert( document.querySelector("#rocket").style.left ) // 300px!
</script>
⚠️ Make sure there's no space between the selector and :hover.
🎩 You don't need an onload listener because Codepen will automatically wait for the HTML to load before running the JavaScript.
....forEach(
	villainDiv => { }
) ;
....forEach(
	villainDiv => {
		villainDiv.onmouseover=() => villainDiv.style.__________="___________"
	}
) ;
Be sure to camelCase any CSS properties with hyphens and quote the value you are setting it to, eg:
...backgroundColor="red";
...transform="translate(100px, 200px)";
🧐 Notice that:
🎟 Before you code: write a one-sentence spec naming the property you'll transition, the duration, and the easing (eg, "fade the content's opacity from 0 to 1 over 0.5s, ease-in-out"). That sentence is your plan — and a working prompt.
Based on the methods shown in the tutorial, modify your previous Single-Page Navigation code to add a smooth CSS transition when the user views a new content block. Note that CSS transitions don't work with changing display to none or block, so you have to make a different change to the content div when the user clicks on a link. Options include:
Post the URL (can be the same as your old version) to #transition.
As an alternative to the transition assignment above, you may add a drop-down navigation menu to your Single-page navigation page (or another site of your choosing) using only CSS. When you're done, post the url to #transition. (Sample)
Note: you must earn both badges, but need only do one #transition assignment.
Timing has names: a half-second ease-in-out fade is a spec; “make it smooth” is a shrug.
* Wednesday 30 October 9am-4pm Register and submit absentee ballot
* Tuesday 5 November 7am-8pm Registe and submit regular ballot
* Student id or drivers license
* Your phone > Mainestreet > Student Center > General Info tab > Addresses, or email with local address (utility bill, delivery shipping notification, etc.)
event.clientX, event.clientY
Example: PointerPointer
// Can only read inline styles. Returns string ending in px:
event.currentTarget.style.left

// Can get dynamic position after a movie. Returns integer:
event.currentTarget.offsetLeft
JavaScript console
console.log is your friend
Close quotes, parentheses, and braces
Incremental changes
Version your code
Process of elimination: Comment out sections
Cross-check browsers frequently
Consider a Mac-to-Windows emulator
⚠️ You will get a CORS (Cross-Origin Resource Sharing) error if you try to run this in CodePen or on your hard drive. So you must upload the files to your web host to test them.
Create a temporary folder for this exercise on your computer (no capitals or spaces in the name!). Then, in a code editor on your computer (not CodePen):
	async function getWeather() { // "async" means pull another file from the server.
		// "await" means wait till this is finished before proceeding.
		let response=await fetch("weather.txt");
		// "response.text()" turns network traffic into readable text.
		let data=await response.text()
		document.querySelector("#report").innerHTML=data ;
	}
🧭 This lesson is the doorway to NMD 445 (Mobile Applications): fetch, requests and responses, and JSON are the same machinery you'll use there to move app data over the Internet.
Using the method explained in the tutorial, revise your div navigation page so that one or more areas of content not on the page when it initially loads are loaded later once the user clicks somewhere. When choosing which content to host remotely, consider which data are likely to slow the initial page load (eg, large images or videos) or which content needs to be updated frequently (such as a news headline). As shown in the tutorial, store these as media and associated HTML snippets on your server, and load the new HTML content to your page using fetch and innerHTML.
⚠️ This technique won't work with CodePen If you want to work from an existing Pen, you can export a zipped version and then use the files you find in the dist folder. (You can rename that folder to anything you want.)
If you are able to transfer a file to your web host and view it online, just upload all the files for this assignment to a folder on your host and post the URL to #fetch.
If you can’t, DM your instructor the .html and .txt files from your hard drive, and he will try to post and run them on his own server.
“Load it later” is a wish; “fetch the JSON from this endpoint when the user clicks” is an instruction — and the working language of NMD 445.
Start with the object you've used since middle school: a phone contact card. Properties are the fields (name, number, photo); methods are the buttons (call, text — things the object can do); the blank "New Contact" form is the constructor; every saved contact is an instance. Dot notation reads naturally: mom.number is "the number field on Mom's card."
⚠️ You cannot use an arrow function for a constructor.
<head>
	<script src="https://js.puter.com/v2/"></script>
	<script id="fetch_ai_image_demo">
		const addImage=() => {
			let promptContent=window.prompt("Enter a prompt for the AI image:");
			puter.ai.txt2img(promptContent).then(img => document.body.appendChild(img));
		};
	</script>
</head>

<body>
	<button onclick="addImage()">Generate AI Image</button>
</body>
Decide what images the Internet needs more of (cats! robots! Harambe!), then:
DivObject=function() {
    this.div=document.createElement( "div" ) ;
    document.body.appendChild( this.div ) ;
	this.div.className="favorite" ;
}
🤔 Notice that the divs don't appear on the screen when you click, but they do in the web inspector.
❓What happens when you click the button now?
background-image: url( https://maryrodriguez.com/nmd345/cat.jpg ) ;
background-size: contain ; /* You can also try cover or change the div height and width to match the image. */
background-repeat: no-repeat ;
❓What happens when you click the button now?
Save your URL to x-multiply-favorites
grid-template-columns: 1fr 1fr 1fr 1fr 1fr ;
/* or this short-hand version: */
grid-template-columns: repeat( 5, 1fr ) ;
Written script at Spawning divs using a JavaScript object
🎟 Spec your object first, like a dealer's order form: model, color, and trim are properties; drive() and honk() are methods; the blank form is the constructor, and every completed order is an instance. Write the order form for your div (properties: color, position, size…) before you write the function.
Write a function to create a rectangle with a random color and position. Then insert this script into a page that lets users populate the page with these divs by clicking repeatedly on the same button or link. Add to your launch page and post the url to #div-mania-1. Sample
Want to add some spice to the pattern? Challenge yourself to add special CSS to the constructed divs, eg to make circles, funky borders, or crazy dots.
⚠️ You can't write the "constructor function" with arrow (=>) syntax. You have to follow the syntax shown in the tutorial, eg DivObject=function() {...}.
The object you’ve used since middle school is a phone contact card: properties are the fields, methods are the buttons, the blank “New Contact” form is the constructor, and every saved contact is an instance.
Linus Torvalds was "Too lazy to fail"--Erik Raymond
You don't create standalone programs, but reusable modules stored in libraries
Playdoh: Make a cookie with red dough, then another with green, etc.--ugh!
JavaScript: Write out every div and style it by hand--ugh!
Playdoh: Cookie-cutter
Can have input (red, blue, green)
JavaScript: Constructor
Can have arguments (red, blue, green)
Playdoh: Add hats, noses, etc.
JavaScript: Add properties or methods to a div
Playdoh: Imagine being able to change the shape of a cookie-cutter after the cookies have been cut!
JavaScript: Change a property of a Constructor *after* instances have been created.
Can't do it if you've assigned properties to the instance already.
Extensions override prototypes.
Copilot is already set up from Lesson 2.00; just confirm you're signed in to GitHub. Prefer another assistant such as Claude in VS Code? Install it now. Taking the alternative path below? No setup needed.
Take your Div Mania function and extend it with an AI pair programmer in VS Code: eg, make the spawned divs circles, give them a transition, or add a second button that clears them. Work incrementally — small prompts, and review each suggestion before accepting it.
Post to #ai-lab: your before/after URLs plus a short judgment log with one line per suggestion — accept / reject / modify + why (3–6 entries). The grade attaches to your log, not to the AI's output.
😌 Alternative path (no AI, equal credit): build the same extension by hand from MDN documentation and post the same 3–6-entry log citing the docs you consulted and what you changed — or critique an instructor-supplied AI attempt at the task using the same accept/reject/modify format.
The differentiating skill is knowing what to delete.
Live demo of the pair-programming loop, then discussion: what did the model default to, and what did you delete?
Pairs compare judgment logs: where did you accept what your partner rejected?
☝️ Treat the guide's glossary as your prompt cheat sheet: every term is a handle for steering browsers, docs, and chatbots alike.
Check your readiness for the test by completing the Review linked in #reference, whose questions are very similar to those on the test. New this year, the Review and Test include two spec-writing formats — forward: "In plain language, write instructions a browser could follow for: clicking the button adds a new item to the list — name the listener, the function, and the array"; and reverse: given a five-line snippet, choose which plain-language spec matches it. (Remember that you can re-take any of the individual quizzes if you weren't satisfied with your original grade 🙂).
Post a mocked-up rendering, storyboard, or other approach for your final project to #project-approach.
Prompt the Webster JS chatbot (v2) pinned to the #reference channel with JavaScript questions to quiz you on any concepts you're still shaky on, eg:
Although it's not a perfect match to material covered in this class, feel free to try your hand at http://www.w3schools.com/js/js_quiz.asp. You should know most everything on the first half of this quiz; you can ignore the JavaScript Math functions, while loop, opening a window, changing the status bar message, or determining your client's browser (though these are all useful things to know 😉)
Given a target (a screenshot or behavior — eg, "three buttons that each turn the background a different color"), write the shortest prompt to the class GPT that produces working code; par is a word count. Precise vocabulary is compression: "buttons with click listeners that set body background" beats forty vague words.
Lateral-scrolling demo: Color in cinema
Lateral-scrolling demo: Italian menu
Fork the template and fill in the blanks in the JS pane to animate the paragraphs as the user scrolls, including your choice of stylistic changes. Save and post your URL to #x-scroll-animation.
Before (or with) your layout post, complete the project spec form [TO BUILD: form link] — seven fields, each reusing vocabulary from this term:
The form doubles as a semester review — and, if you choose to use AI, an AI-ready brief.
Post to the #final-project Slack channel an improved version of the approach you originally posted to #project-approach. This layout must be built with HTML and CSS (eg, via CodePen). Your layout should incorporate one or more of the following:
Your layout should incorporate some of the design principles learned in this class (eg, a limited color palette/smallest effective difference). You do not need to incorporate any JavaScript at this stage. That is, menus and animations do not need to be active yet.
Your project spec is written in the vocabulary you’ve earned all term.
Form groups depending on which navigation paradigm you chose for your final project
As a group, find examples online of these navigation paradigms. Show the class the best and worst examples you find, and explain what is good or bad about each.
Fill in the blanks in the template to build a working image carousel. You will make changes in the CSS, JS, and HTML panes. Post your working Pen to #x-image-carousel.
-
Export your class project from CodePen or download it from your web host, and open the dist folder in VS Code. Then open Copilot Chat (Ctrl+Cmd+I) and ask it to review your HTML, CSS, or JavaScript code and suggest improvements such as:
Post a screenshot of the three most useful suggestions to #project-review, along with a brief explanation of why you think each suggestion would improve your project.
Choose at least one of these suggestions and ask Copilot to help you implement it. You may ask Copilot to generate the new code, explain how to modify your existing code, or debug problems that arise during implementation. Post your updated project URL to #project-review, along with a brief description of what suggestion you implemented and how Copilot helped.
Also post a judgment log with one line per suggestion you considered — accept / reject / modify + why (5–10 entries). The grade attaches to the log, not to Copilot's output.
Post your code to #troubleshooting and ask your classmates for feedback on how to improve it. You can ask for general feedback or specific feedback on any aspect of your code, eg, drawing from the list above. Post the revised code to #project-review once you've made improvements based on the feedback. Post early so your instructor and classmates have time to review it.
Equal credit either way — and the same judgment log applies: 5–10 accept/reject/modify entries on the feedback you received, whether it came from classmates or from an instructor-supplied AI review of sample code.
“It doesn’t work” gets a guess; “the console shows x is undefined on line 12” gets a fix — from a classmate, an instructor, or an AI.
Share your experience using Copilot to review code. Did the suggestions make sense? Would you implement them? Why or why not?
Design Detective taught you to spot human defaults; Slop Detective [TO BUILD: eight AI-default/professional pairs in the Design Detective engine] teaches you to spot machine defaults — uniform rounded cards, gray-purple gradient heroes, identical shadows, centered-everything. Same cure for both: deliberate CSS vocabulary. Design is what happens when you override the defaults.
Opportunity versus prescription
Discussion on evaluating Copilot recommendations: Does the suggestion align with best practices? Is it appropriate for your project? Does it introduce security or performance concerns?
To prevent full-width content on a big screen, wrap your content in a container div and set a max-width and auto left/right margins. Example:
<body>
	<header>
		<!-- Your header content -->
	</header>
	<main>
			<!-- Your main content -->
	</main>
</body>
Add this CSS:
main {
  max-width: 800px;
  margin-left: auto;
  margin-right: auto;
}
🎩 You can make this shorter with a combination selector (the 0 is vertical margin):
main {
  max-width: 800px;
  margin: 0 auto;
}
🎩 Or use CSS grid to enable vertical centering, multi-item alignment, or responsive track-based layouts.
body {
  display: grid;
  place-items: center;
  height: 100vh;
}
main {
  min-width: 800px;
  background-color: red;
}
Post a screenshot of your high score to #design-detective.
-
Post to the #final-project Slack channel an improved version of your project that includes JavaScript. Remember that you'll get extra participation credit by posting to the #troubleshooting Slack channel one of the following:
These posts must be as detailed as possible, quoting any problematic or exemplary code in your actual message.
If your project is a Web site, also link to your files online; if a bookmarklet or extension, you may attach the files to your message.
Create a 10-second screencast to test your recording setup and the legibility of your code on-screen, following the advice in the video tutorial or its written instructions. At the same time, record your voice explaining what you are doing. Aim for no more than 15-20 lines of code visible on the screen.
(You'll add a highlight to the screencast in your iteration for next time.)
Post the actual movie (not link) as an attachment in #screencast. Samples of completed screencasts
Post the latest version of your project to #final-project, adding any questions to the #troubleshooting conference in advance. Bear in mind the grading rubric, especially:
If you created a completely different project (eg an online game), your instructor will evaluate it based on the more general principles of clear documentation, technical complexity, and good design.
Start from your old 10-second screencast or create a better one for this assignment. Following the advice in the video tutorial or its written instructions, add a highlight to the screencast such as an oval or rectangle to at least one technical detail--such as a snippet of JavaScript--that you are using to make your project. Do not rely on selecting the code, which can result in a less legible result!
Post the movie as an attachment (or link to the movie in Google Drive, Loom, or YouTube) in #screencast.
Before posting, run your project against the Design Detective Reference Wall [VERIFY URL] — one pass through the checklist, fix what you catch.
Using a chatbot of your choice, post a prompt like this to practice answering interview questions for a job for which web design or development skills are relevant:
You are now a recruiter for a company that creates web applications and are interviewing me for a job as web applications designer and developer. You will ask a series of questions ranked with four levels of difficulty, with 1 being the easiest and 4 being the hardest. Please type "yes" if you understand this role.
I will type a number corresponding to the level of difficulty for your next question, and then you will ask me an interview question related to this job. Once I've posted my answer, you will evaluate my response assuming the job I'm applying for corresponds to the appropriate level, with 1 being an entry-level position and 4 being a senior developer. You will also make any suggestions for how I could have answered the question better. Once you have made this critique, you will type "What level would you like for the next question (1–4)?" We will repeat these questions and answers until I type "stop." Type the word "yes" if you understand this request.
-
Complete the survey linked in #reference about your use of AI tools in this class. This survey counts as a Quiz but will be graded not on whether or how you used AI in this course but on how thoroughly you explain your process and evaluate the results.
Create a brief screencast that uses your final project to explain one specific technique used to create it. Your goal is not to describe all aspects of your project but to focus on a single detail. (Follow the model of the demo videos from previous years.)
As always, ensure that any code you show on the screen is zoomed in far enough to be legible. 30-120 seconds is usually enough to get the technique across, providing you dig deeply into explaining how the code works. You can do this by highlighting specific snippets of code and explaining what they do. An even clearer technique is to edit parts of the code and show how that affects the output in a browser--eg, how adjusting a CSS transition makes an animation longer or how adjusting a variable changes the position of a <div>.
🤖 If your chosen technique involved AI, structure the segment as prompt → raw output → your edit → effect in the browser — the "edit the code and show the change" requirement above, with the AI draft as the before state. It also satisfies the ledger spot check. (Hand-coded projects: no AI segment needed.)
Post this movie to #screencast in Slack as an MPEG-4 file. (Do not just post a link to YouTube or Vimeo.)
Complete your project and post the final URL to #final-project.
😌 If cleared by your instructor in advance, you may omit this step.
-
Add your final project approach or release to The Pool.
JavaScript v. ActionScript
Authoring interface
Timeframe for completion
Text v. media
Usability
View source
$$$
Compatibility (Flash can't run on iOS)
Classes
Packages
Linkage
-
Revise your demo screencast based on the feedback you've received so far. Make especially sure that any code you show on the screen is zoomed in far enough to be legible. If not, modify your movie according to the suggestions in the screencast tutorial.
Post the actual movie (not link) as an attachment to #screencast.
Colors from a photo (previously Color CC)
Code from comments via Copilot or Codewhisperer